Process data, Publish it and Subscribe to a topic
Legacy MQTT is deprecated. The TagoIO MQTT Broker was available exclusively for Starter and Scale accounts in the US database region that upgraded before April 15, 2026. Accounts created or upgraded after that date do not have access to this feature.
Please migrate to TagoTiP MQTT, which supports all account types and regions (US and EU).
Existing devices and actions will continue to function during the deprecation period, but no new features or bug fixes will be provided.
In this tutorial, you will learn how to process data, publish to a topic, and subscribe to it. The tutorial uses the MQTTX client throughout.
Connecting to TagoIO MQTT Broker
To publish a topic via TagoIO's MQTT, you must first add a device.
- Navigate to the Devices module in your Admin panel and create a new device. You may choose any connector you prefer; it will not make a difference.
- After creating the device, open the device’s General Information tab and locate the tokens section.
- Copy your device token from the tokens section — this token is required to authenticate when publishing or subscribing via the TagoIO MQTT broker.
Open MQTTX and create a new connection
| Field | Value |
|---|---|
| Name | Any name you like |
| Host | mqtt.tago.io |
| Port | 1883 |
| Username | "Token" |
| Password | Your device token |
| Client ID | Can be set to any unique identifier |
The Client Identifier (ClientID) is a required field to connect to the TagoIO MQTT Broker.
Subscribing to a topic
- In MQTTX, go to the Subscribe tab.
- Type
sensor/outputin the Topic field and click Subscribe. - You should now see any messages that are published on this topic appear in the client.
Processing the data
In this step we create an analysis that converts temperature from Fahrenheit to Celsius and publishes it on the topic sensor/output. The analysis is triggered whenever a message is received on the topic sensor/input.
Note: Replace "DEVICE_ID" with your actual device ID. You can obtain this ID by accessing your device's page and copying it from the URL, for example: https://admin.tago.io/devices/652425f4516e99000a522dce.
const { Analysis, Services } = require("@tago-io/sdk");

const DEVICE_ID = "YOUR_DEVICE_ID"; // Replace with your actual device ID

async function mqttPushExample(context, scope) {
  console.log(context, scope);
  if (!scope.length) {
    return context.log("Missing values");
  }

  const myData = scope.find((x) => x.variable === "payload") || scope[0];
  if (!myData) {
    return context.log("Couldn't find any variable in the scope.");
  }

  // Create your data object to push to MQTT
  const myDataObject = {
    variable: "temperature_celsius",
    value: (myData.value - 32) * (5 / 9),
    unit: "C",
  };

  // Options for publishing
  const options = {
    retain: false,
    qos: 0,
  };

  // Publishing to MQTT
  const mqtt = new Services().mqtt;
  await mqtt.publish({
    device: DEVICE_ID,
    message: JSON.stringify(myDataObject),
    topic: "sensor/output",
    options,
  });
}

module.exports = new Analysis(mqttPushExample);
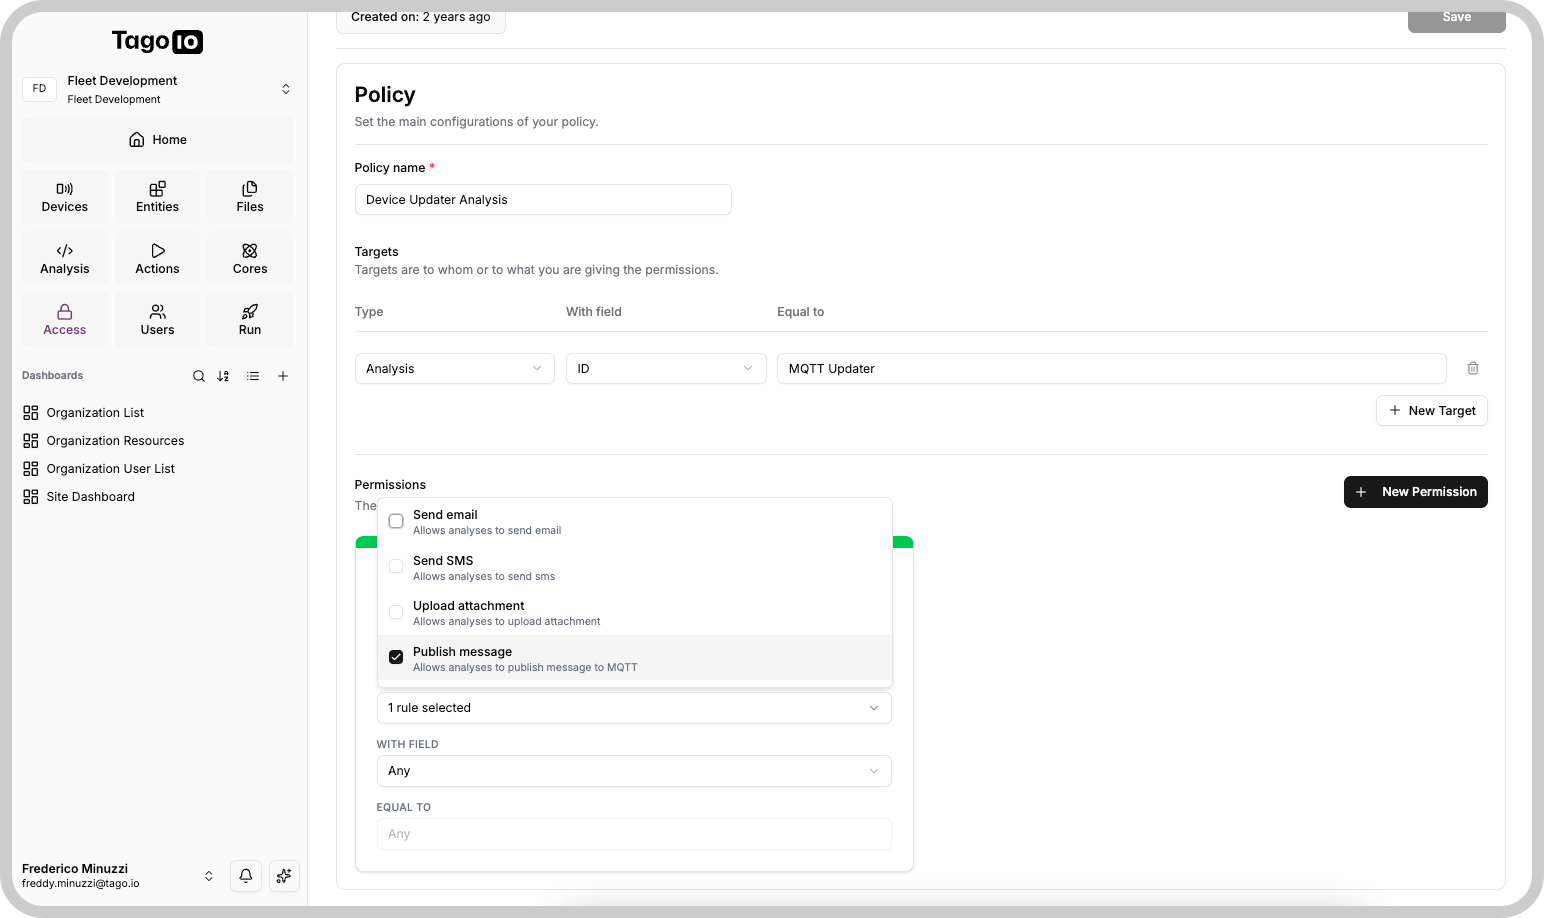
Permissions
This analysis requires permission to send MQTT data to the device. Enable this access in the Access Management module by creating a new Policy.
Creating an Action
- Go to the Actions module and create a new action.
- Set:
- Name: Any name
- Type of Trigger: MQTT Topic
- Trigger:
sensor/input - Device: The device you created earlier
- For the action type, choose Run Analysis and select the analysis you just created.
- Click Create my Action.
Now, whenever a message is published on the topic sensor/input, the analysis will run, convert the temperature to Celsius, and publish it to sensor/output. You can test this by publishing the value 32 on sensor/input using MQTTX; the converted value should appear in the client.
If you need help with your MQTT connection, request help in our Community!